Dance Shoe Fitting: Support, Movement, and Studio Rules
On this page
Quick answer
A dance shoe should match the class style, studio floor, and teacher requirements while holding the foot securely without numbness, pinching, or uncontrolled sliding. Try both shoes with the socks or tights used in class, stand and move on an approved clean surface, and ask about return rules before marking the soles. Stop using a shoe when damage changes traction, support, or fastening.
Confirm the class and studio requirements
Choose the required shoe category before comparing size or appearance. Ballet slippers, tap shoes, jazz shoes, character shoes, ballroom shoes, sneakers, and foot-undeez are built for different movement and floors. A street shoe that feels comfortable may carry dirt, leave marks, grip too strongly, or lack the flexibility expected in class.
Ask the studio or teacher for current guidance:
- the permitted shoe type, material, sole, heel height, and color;
- whether bare feet, socks, or clean indoor-only sneakers are allowed;
- requirements for performance, exams, auditions, or partner work;
- the floor surface and any restrictions on rubber, metal, rosin, or outdoor wear;
- whether beginners should wait until after the first class to buy; and
- whether the studio uses a preferred fitter for specialized footwear.
Do not assume rules from another studio transfer. Even within the United States, teachers may make different choices based on curriculum, floor construction, safety, and production needs.
Check the fit while standing
Feet change with time, activity, injury, pregnancy, and time of day, so start with current measurements of both feet. Use the larger foot as the initial reference, then evaluate the actual shoe because brand and model sizing can differ.
- Put on the same tights, socks, or bare-foot setup used in class.
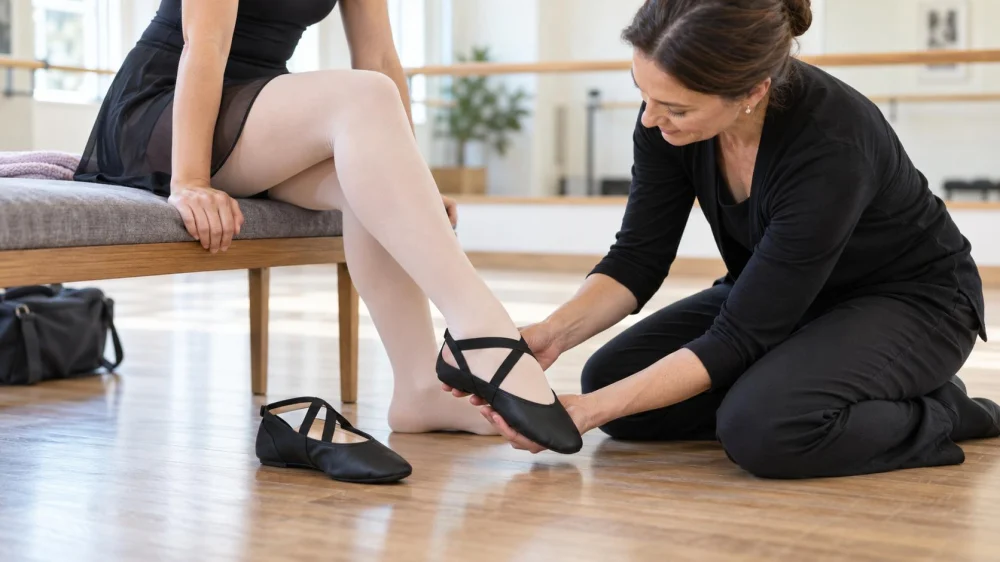
- Seat the heel fully and fasten every strap, lace, or elastic as intended.
- Stand with weight distributed normally and check the toes, ball, arch, sides, and heel.
- Look for bunching, gaping, hard pressure points, or a heel that lifts.
- Wear both shoes for several minutes; one foot may need a different adjustment.
A close fit is not the same as a painful fit. Toes should not be forced into an unnatural shape unless a qualified fitter and teacher are guiding a discipline-specific requirement. Numbness, burning, sharp pressure, skin color change, or loss of control are stop signals, not a normal break-in goal.
Test the shoe through basic movement
Test only on a clean surface approved by the seller so the shoes remain returnable. Use simple movements relevant to the class rather than difficult skills: bend and straighten, rise and lower, transfer weight, point and flex, walk, and make a small controlled turn if appropriate.
Watch for these decision cues:
- The foot should not slide forward during a bend or direction change.
- The heel should remain seated without a fastening that cuts into skin.
- The sole should flex where the technique requires, not collapse unpredictably.
- Traction should allow control without sticking or uncontrolled slipping.
- Sound-producing hardware should feel stable and sit as designed.
- The shoe should allow the teacher to see or correct alignment when required.
Ask the fitter or teacher to observe when the choice involves pointe shoes, higher heels, orthopedic concerns, or a return from injury. Online size charts cannot assess how a particular foot moves inside a specialized shoe.
Inspect soles, fastenings, and construction
Before purchase, compare the left and right shoe for matching shape, intact seams, secure heel attachment, even sole placement, and working fasteners. Check that elastic or straps follow the maker and studio guidance; sewing them in the wrong place can change support or circulation.
For used shoes, inspect wear patterns and hygiene carefully. A molded footbed, stretched upper, compressed cushioning, loose tap, worn suede, or damaged shank may make the shoe unsuitable even when it looks inexpensive. Some highly fitted footwear should not be transferred between dancers.
Confirm the return and exchange policy in writing. Ask whether trying shoes at home, sewing elastics, adding rosin, wearing them on a studio floor, or marking the soles makes them final sale. Keep the box, receipt, and packaging until the teacher approves the fit when that is part of the process.
Break in, care for, and replace dance shoes
Break in shoes gradually during low-risk practice approved by the teacher. Do not bend, cut, hammer, wet, heat, or chemically treat footwear unless the manufacturer or qualified fitter specifically directs it. Aggressive shortcuts can damage structural parts and void returns.
After class, remove shoes from a sealed dance bag, allow them to dry naturally, and keep them away from direct heat. Clean soles only with the method suitable for their material and the studio rules. Label shoes discreetly without creating a rough surface or visible mark required to remain uniform.
Replace or repair footwear when a sole separates, a fastening fails, a heel loosens, traction changes sharply, padding compresses, hardware shifts, or the upper no longer holds the foot. Stop immediately when damage appears during class and tell the teacher rather than finishing a combination in an unstable shoe.
Frequently asked questions
Should dance shoes match street-shoe size?
Not necessarily. Sizing varies by style, brand, model, and foot shape. Treat the size chart as a starting point and evaluate both shoes while standing and moving.
Do dance shoes need room to grow?
Children's fit should be checked by a teacher or experienced fitter. Too much room can reduce control and create rubbing; do not buy an unsafe size only to extend wear.
Can I wear dance shoes outdoors?
Usually this is discouraged because outdoor wear brings grit onto the studio floor and changes sole condition. Follow the studio rule and use separate street shoes for travel.
Is pain normal while breaking in shoes?
Sharp pain, numbness, burning, skin color change, or loss of control are not goals. Stop, remove the shoe, and seek appropriate fitting or health guidance.
When should a teacher check the shoes?
Ask before buying when the syllabus specifies footwear, and before altering or wearing specialized shoes. Pointe and performance footwear commonly need closer approval.
Conclusion and next steps
Confirm the exact class requirement, measure both feet, test the complete fit, and move only on an approved surface. Keep the return policy and receipt until the choice is settled. A suitable dance shoe supports the required technique and floor relationship without pain, unstable fastening, or a fit that forces the dancer to compensate.
 Psalms 150 Dance Studio5.0 (5 reviews)
 Mona Khan Company3.0 (12 reviews)
 Elite 92 Dance & Cheer Academy5.0 (2 reviews)
 8 Count Dance AZ5.0 (3 reviews)
 New Era Dance Co.5.0 (4 reviews)
 RS Beats Dance Group5.0 (2 reviews)
 Why Waltz Is a Popular Fitness Routine – Benefits of Waltzing for Health
 How to Master K-Pop Dance for Kids: Fun Tips and Techniques
 What Is a Ring Dance in High School and How to Prepare for It
 How to Master Bachata That Boost Confidence
 Foxtrot to Try in 2025 – What You Need to Know
 Samba You Can Learn at Home: Common Mistakes to Avoid